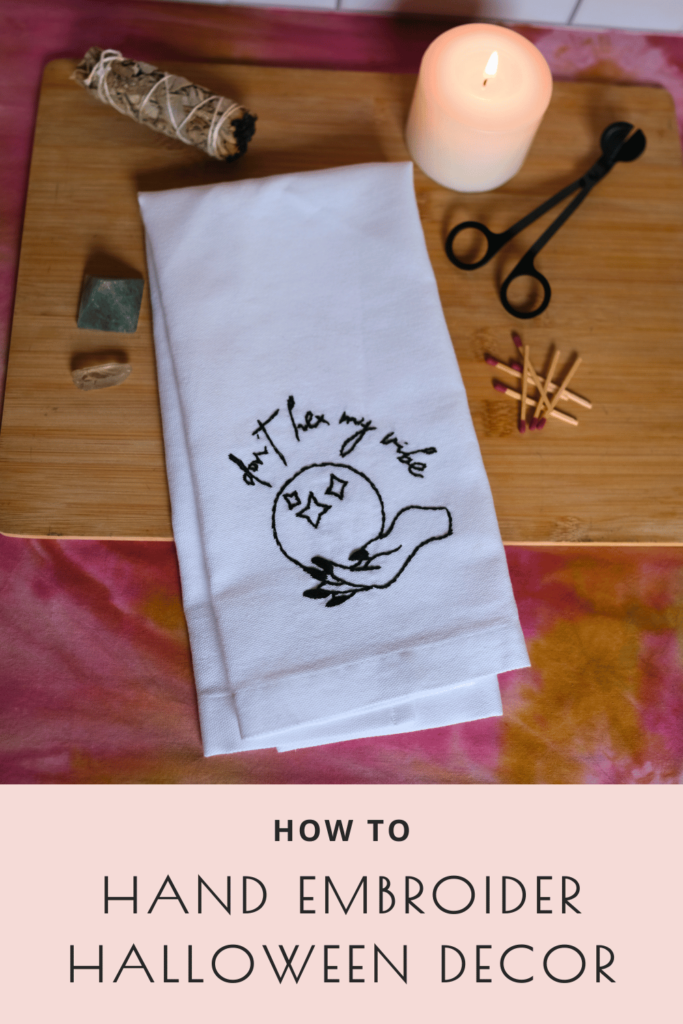
Get ready to add a touch of spooky fun to your kitchen with DIY Halloween hand embroidery! This simple and creative project will bring a wickedly charming atmosphere to your home while impressing your guests.
Growing up, our house was decorated from top to bottom for every holiday and Halloween was no exception. From Halloween trees to haunted gingerbread houses, from ghosts hanging in the front yard to spooky tunes throughout the house, my mom went all out. My favorite decorations always included a handmade element, like her hand-embroidered tea towels proudly on display for every season. It’s such an easy way to add a personalized pop to your decor!
Unlock your creativity as you personalize your tea towels with cute or creepy embroidered designs of witches, ghosts, bats, or pumpkins – the choice is yours! With basic embroidery stitches like the split stitch, backstitch and satin stitch, you’ll be able to create whimsical and hauntingly unique designs that are simple yet striking.
Not only will these hand-embroidered tea towels spook up your kitchen decor, but they also make fantastic gifts for friends, family, and Halloween hosts. Imagine their devilish delight when they receive a custom, one-of-a-kind gift that will become a cherished Halloween keepsake.
So, roll up your witch’s robes, grab your needle and thread, and let your imagination run wildly wicked. These DIY hand-embroidered tea towels will make your kitchen a bewitching place this Halloween. Get started on this spooktacular project today and amaze everyone with your creative skills!
Step-by-Step Guide to DIY Halloween Hand Embroidery
For a quick overview, here are the 8 steps to create your DIY Halloween embroidery on a tea towel:
- Gather your materials: tea towel, embroidery floss, embroidery needle, embroidery hoop, scissors, Halloween embroidery design, and transfer marker
- Prep your tea towel by ironing
- Transfer your embroidery design onto your tea towel
- Place your tea towel in the embroidery hoop
- Thread your needle with embroidery floss
- Embroider your Halloween design with a variety of stitches and/or colors
- Remove your tea towel from the embroidery hoop and iron again
- Display your Halloween hand embroidery in the kitchen or bathroom
To learn more about each step and some of my favorite hand embroidery tips, keep reading!
Choosing the Right Tea Towels for Embroidery
When it comes to hand-embroidering tea towels, choosing the right base material is crucial.
Look for tea towels made from high-quality, absorbent fabric like 100% cotton or linen with a tight weave. These fabrics provide a smooth surface for embroidery and allow the stitches to stand out.
Consider the size of the tea towels based on your intended designs and the area you plan to display them.
Opt for plain white, black, or neutral tea towels without any existing patterns or designs to act as a blank canvas for your bewitching stitches.
I upcycled my tea towel from a 100% cotton curtain that I thrifted at Goodwill. Tutorial coming soon!
If you like upcycles, check out my faux pottery paint hack!
When purchasing new, flour sack towels are my go-to. Mary’s Kitchen Flour Sack Towels are simply the best! (Not affiliated, I stand by their quality.)
Basic Embroidery Stitches for Beginners
Hand embroidery may seem intimidating, but with a few basic stitches, you’ll be well on your way to conjuring bewitching designs.
The backstitch is a versatile stitch that is perfect for outlining shapes and creating crisp lines.
The split stitch is great for cursive letters and another more textured option for outlining shapes.
The satin stitch, on the other hand, is ideal for filling in larger areas and adding dimension to your designs.
If you are new to hand embroidery, practice the stitches and techniques on a scrap piece of fabric before starting on your tea towel. This will help you refine your skills and ensure you’re comfortable with the stitches before creating the final project.
DIY Halloween Hand Embroidery Design Ideas
When it comes to DIY Halloween hand embroidery, the design possibilities are endless. Let your imagination run wildly wicked and choose elements that reflect your style.
Consider stitching cute ghosts, spooky bats, grinning pumpkins, or bewitching witches onto your tea towels.
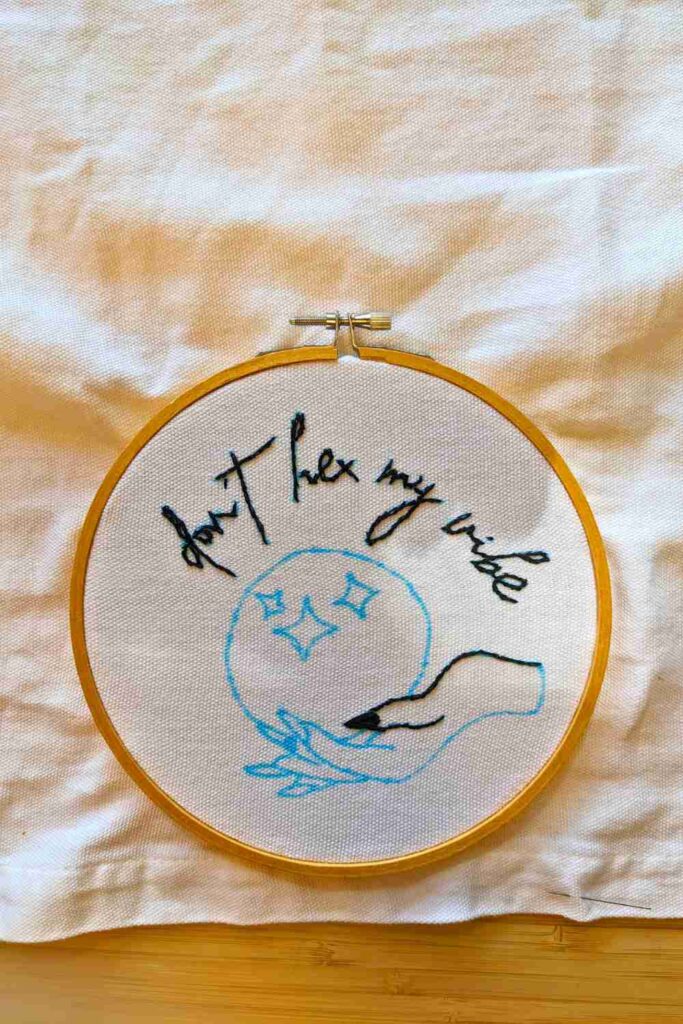
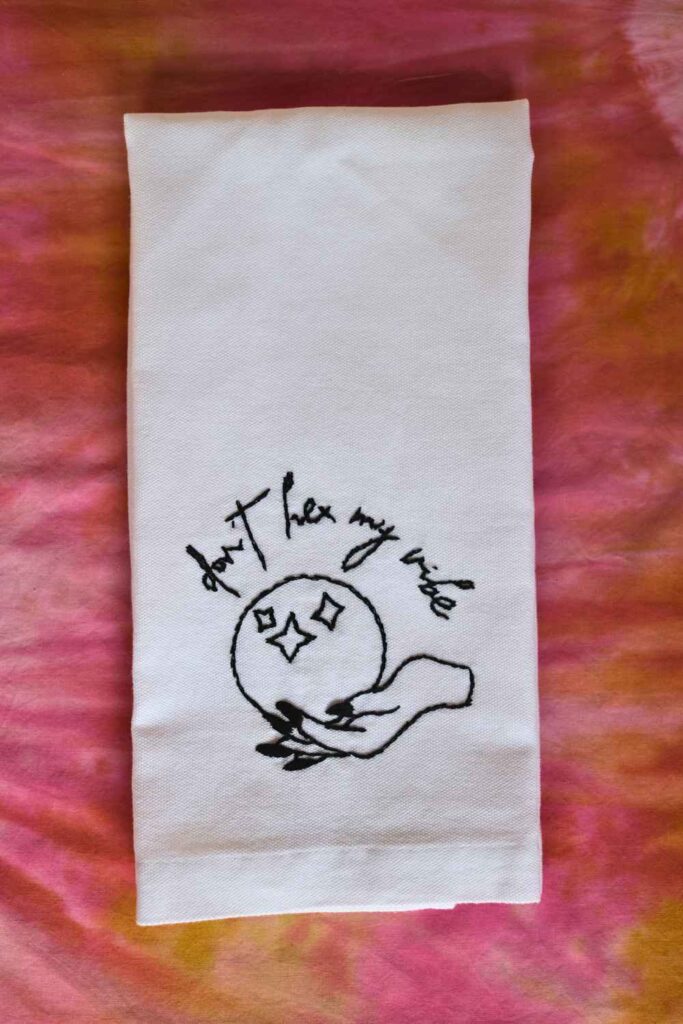
You can also incorporate Halloween phrases or quotes to add an extra touch of magic.
Browse online for inspiration or create your own unique designs. The key is to have fun and let your creativity shine through your embroidery.

I wanted a custom, unique design so I created my designs using Canva. This free design tool will enable you to create a Halloween-themed embroidery design that you can transfer onto your tea towel. There are tons of free fonts and graphic elements to choose from, and even more options if you have a pro account.
Let me know in the comments if you want tips on how to create an embroidery design in Canva!
Step 1: Gather Your Materials
Before we start, let’s gather the materials you’ll need for this project:
- Plain tea towel: Choose a high-quality tea towel in a plain color, such as white or black. This will provide a good blank canvas for your embroidery design. Look for 100% cotton or linen with a tight weave.
- Embroidery hoop: An embroidery hoop will keep your fabric taut while you work, making it easier to handle while you create even stitches. A 6” or smaller hoop should do the trick since you’ll be stitching in a tight area.
- Embroidery needles: Select a set of embroidery needles in different sizes to accommodate various thread thicknesses. I found a size 3 embroidery needle worked best with my fabric.
- Embroidery floss: Choose Halloween-themed colors like black, white, orange, purple, and green. I stuck with simple black thread on a white tea towel for a high contrast look, and plan to make some with white thread on a black towel as well. I always use DMC Six-Strand Embroidery Floss. The threads are smooth so it’s easy to use, and it’s widely available at craft stores and even Walmart.
- Embroidery scissors: A sharp pair of embroidery scissors will help you cut your thread cleanly, keeping everything neat and tidy.
- Water Soluble Marker or transfer paper: You can either trace your design directly onto your tea towel or use transfer paper to transfer the design onto your tea towel.
- I used a marker and placed my tea towel directly over my computer monitor. The pen did not bleed through and mark my screen. Alternatively, you could print the design on paper and utilize a well-lit window or lighted tracing table.
- Embroidery design: Create your own DIY Halloween hand embroidery design using a free tool like Canva or you can purchase Halloween-themed embroidery patterns on Etsy.
Step 2: Prepare Your Tea Towel
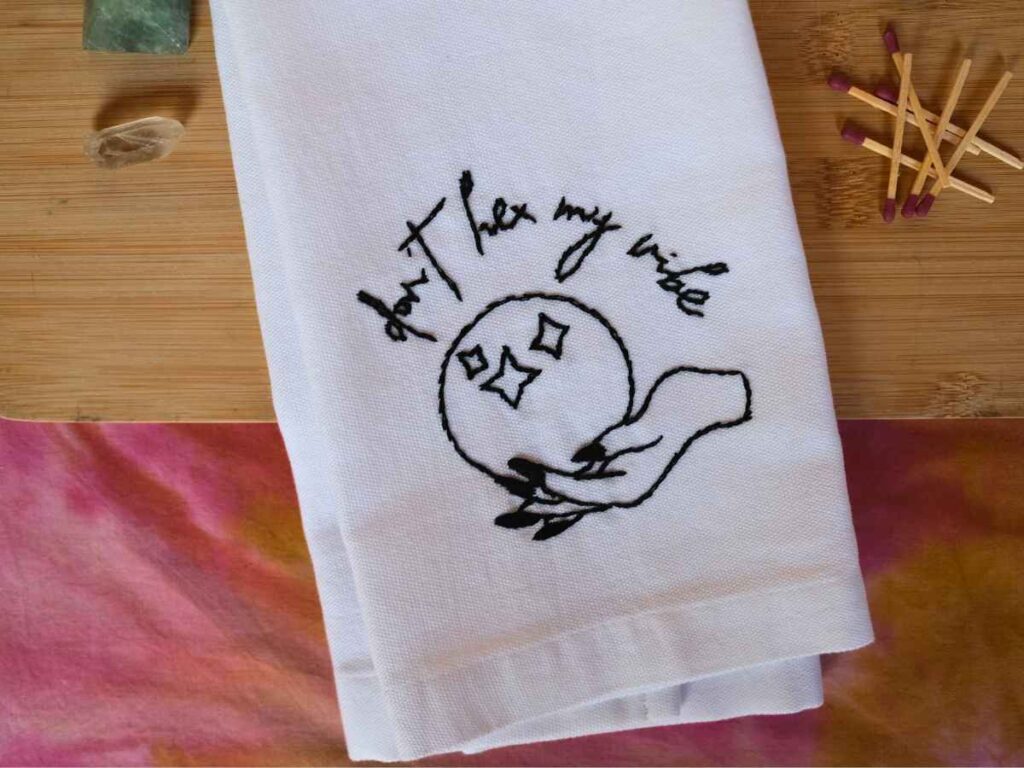
Prepare your tea towel by ironing it to remove any wrinkles. Determine where the design will go, keeping in mind how you intend to fold the towel when hanging to ensure your design will show. I fold my towels in thirds when they hang on my oven, so I placed my design in the middle section just above the bottom hem.
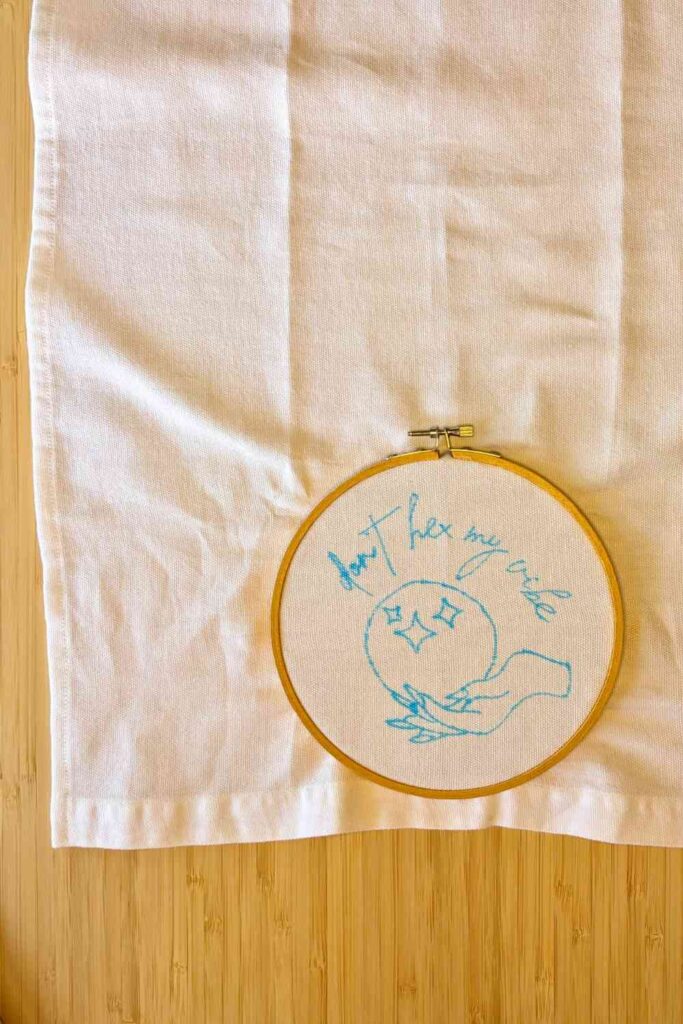
Step 3: Transfer Your Halloween Embroidery Design
Transfer your design onto your teal towel, adjusting the size of your design as needed to fit the available space.
If you don’t have a printer or a lightbox like me, drape your tea towel over the computer monitor and zoom in or out to fit the design within your tea towel. Hold up your embroidery hoop to double check you have enough available surface area to stitch the edges of your design. Tape your tea towel to the monitor so it is taught. Trace the design with the water soluble marker.
To print on paper or transfer paper, export your design as a PDF or JPEG file to transfer onto your tea towel. Make sure you adjust your design to the right size before printing.
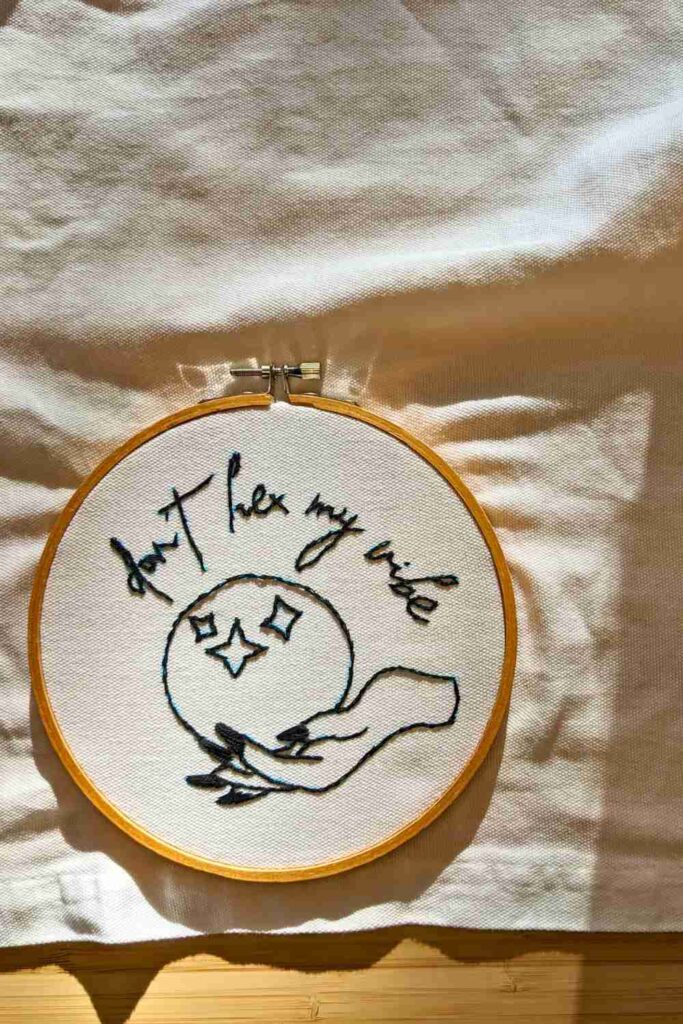
Step 4: Place Your Tea Towel in the Embroidery Hoop
Place your tea towel in the embroidery hoop and ensure that the fabric is taut but not stretched too tightly. Your transferred design should still be straight and not wonky.
Step 5: Thread Your Needle
Choose the color embroidery floss you want to start with and pull out two lengths of the skein. This gives you about an arm’s length of embroidery floss and is a comfortable length to work with without getting tangles or knots as you stitch.
Split your six-strand embroidery floss into two sections of three strands each. Depending on your design, you may choose to stitch with two or three strands for a thinner or thicker line respectively. Tie a knot at the end of your thread.
Here’s a trick to tie a not: After threading the needle, hold the needle in your right hand. Wrap the long tail around the needle 3 times, taut but not too tight. Grab the pointy end of your needle with your left hand, and with your pointer finger and thumb of your right hand, pull the wrapped thread down the shaft of the needle, over the eye, and keep pulling all the way to the end of the thread until a knot is formed. Trim any excess thread in the tail.
Step 6: Embroider Your Halloween Design
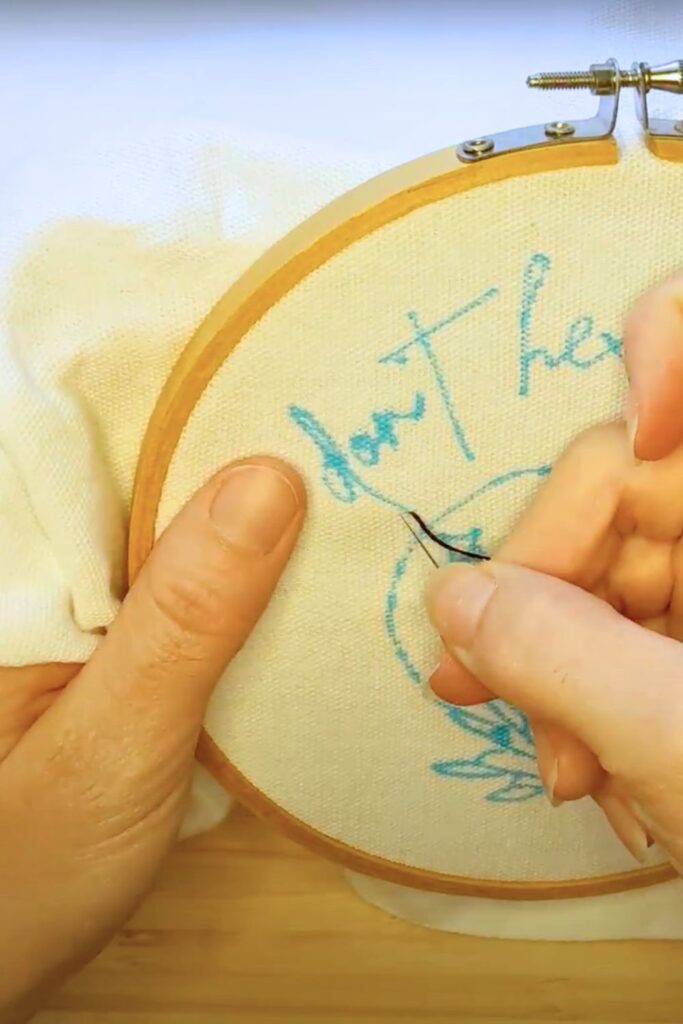
Begin embroidering your design by following the lines and shapes of your design.
I opted for a split stitch along the cursive words and the outline of the designs. This added to the overall witchy aesthetic of my design. A backstitch is another great option, and may be easier depending on your skill level.
Experiment with different stitches to add details to your design. French knots or satin stitches add texture and interest to your embroidery. French knots are perfect for creating small details like bat eyes, magic sparkles, or dot the top of a lowercase “i”. Satin stitches or even a group of French knots can fill in solid areas to create shading.
My design was created with split stitches for the letters and graphic outlines, and satin stitches to fill the witch’s black nails.
A few tips for DIY Halloween hand embroidery:
- Use the right tension: Maintain consistent tension on your stitches for a neat and uniform appearance. Avoid pulling the thread too tightly, which can cause the fabric to pucker, or too loosely, which can result in loose stitches. You may find you need to adjust the tension of your hoop as you stitch if the tea towel loses tautness.
- Keep the backside neat: By intentionally starting and stopping your stitches along natural breaks throughout the design, you’ll keep the backside neat and tidy. Instead of traveling your needle all across the design, plan your route before you start stitching. At the end of a section, turn your work over to the back and wind the tail of the thread through the underside of a few stitches to secure the tail.
- Take breaks and rest your eyes: Embroidery can be a meticulous task, so remember to take breaks and rest your eyes to avoid strain. This will help you maintain focus and achieve accurate stitching. A good task light will make the work much easier to see too.

Step 7: Remove Your Tea Towel from the Embroidery Hoop
Once you’ve completed stitching your DIY Halloween hand embroidery design, remove the tea towel from the embroidery hoop and trim any excess thread. Be gentle to prevent any damage to your stitches.
If you used a water soluble marker to trace the design, run a gentle stream of water over your stitches to remove the marks.
Iron your tea towel once more to remove any wrinkles and smooth the imprint of the embroidery hoop. Be careful not to drag the iron over your stitches. You can either press lightly and hit it with steam or place a clean cloth over your embroidery to protect the stitches.
Step 8: Display Your DIY Halloween Hand Embroidery
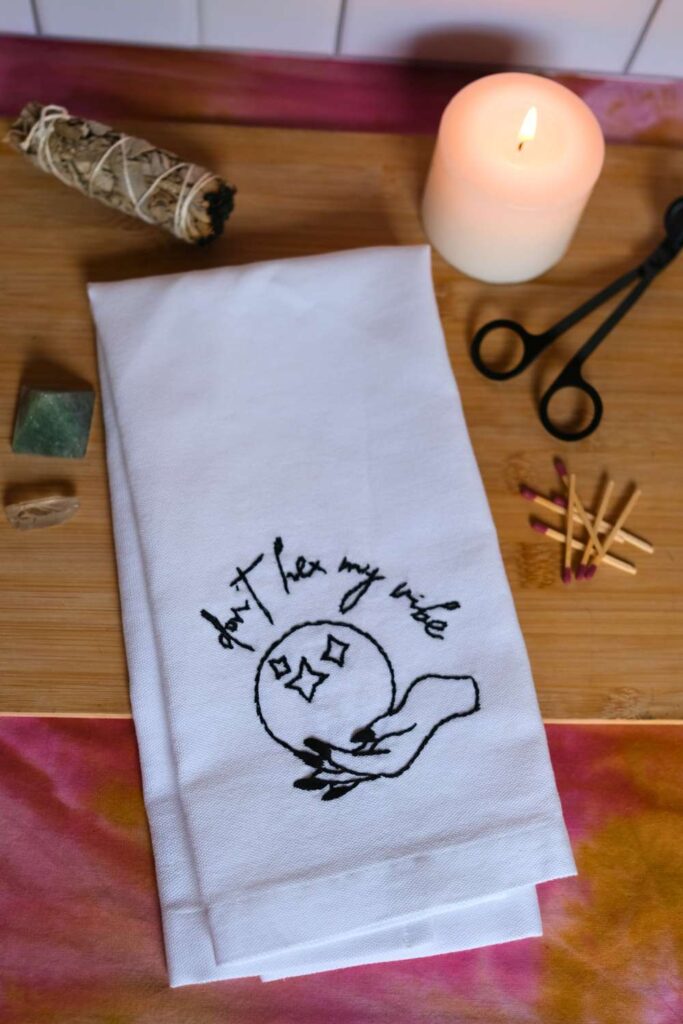
Your DIY Halloween hand embroidery is now ready to adorn your home. Hang your embroidered tea towel in your kitchen, bathroom, or even frame them for an eerie wall display.
Embellishing your home with haunting DIY Halloween hand embroidery is a delightful way to customize your home decor. Whether you’re an experienced embroiderer or a beginner, this project is both fun and rewarding. So, grab your supplies, conjure your favorite Halloween designs, and have fun spookifying your space with these bewitching hand-embroidered tea towels. Happy Halloween crafting!


These look so fun! Love the design you used. Can’t wait to try my own.
Looking forward to seeing what you stitch up! Thanks, Christy!